
Over 20 years of selling property I have seen many makeovers, some good and plenty not so good.
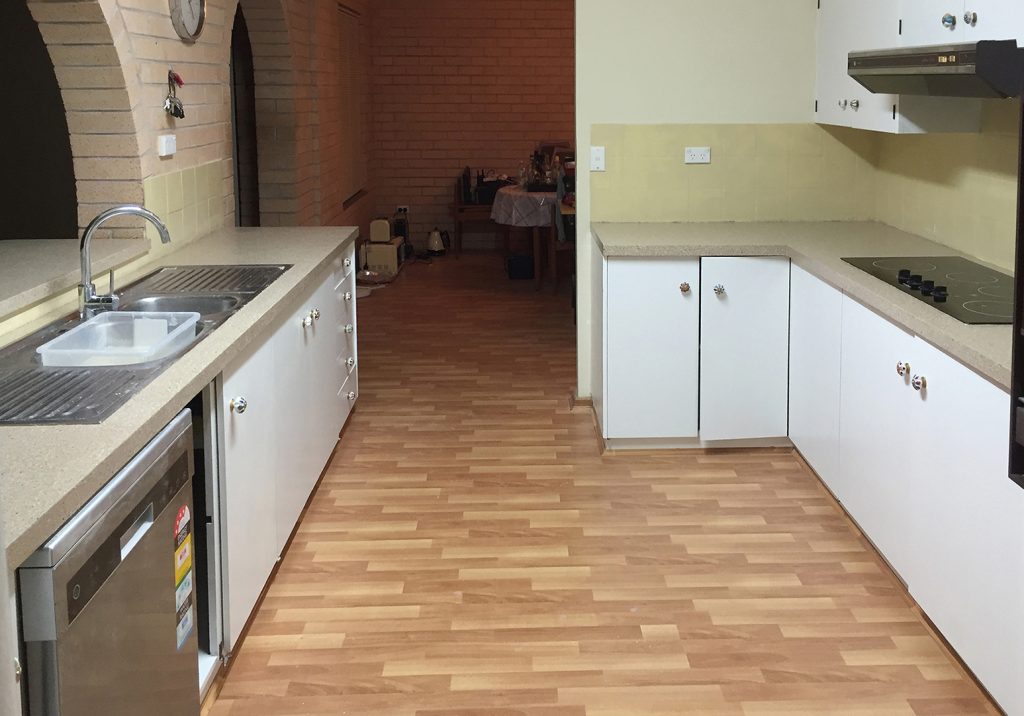
In a holiday house we purchased was a kitchen that may have been quite a showpiece..in 1970/80! This property had been kept in
excellent condition and had great bones so we decided a makeover would be our most economical option. My wife Irena and I did this
over four weekends at a cost of $500.
We’ll be sharing our progress with you over the coming weeks.

Our first job after we’d decided the cabinet frames were sturdy enough to keep was to remove the doors for sanding and painting.
Irena worked on the doors while I moved on to the cabinets. We spoke to the assistant in the paint shop for advice on the best paint
for the door surfaces. The old lacquered doors had to be sealed before applying 2 x top coats with a sponge roller. We picked up our
new porcelain handles from a secondhand shop.


NOTE: Remember to check how many screws are used on the handles you are replacing before going shopping. Some handles require
more than one screw and spacing can vary. You don’t want to be having to drill more holes if it can be avoided.
The double bowl sink was in good condition so we decided to reuse it. Firstly, the water was turned off at the main (don’t forget
that step or things could get nasty) and the sink disconnected. We moved the bench out, capped off the plumbing out of the wall
and then removed the sink so we could make some adjustments to the cupboard space to fit our dishwasher.


We’d measured up and knew when the bench went back in we’d have to shuffle it to the side a bit to allow for the fridge. No drama because
we’d purchased a mixer tap to replace the old spout in the sink & made sure we got flexi hoses long enough to accommodate shifting the bench.
A couple of stainless steel plugs covered the holes that were left in the sink from the taps.


With the doors removed and painted it was time to paint inside the cupboards, kickboards and the wall oven cabinetry. Same process with
sanding and sealing top coats. Once dry we lined the cupboards.


To keep the place tidy some of the doors went back on and then we started prepping for the floating floors.
Strangely enough I was finding the lime green less ‘offensive’ after getting as close and personal as I had been, however Irena assured me
the end result would be worth the effort.


Next step, we were now ready to lay the floating floor. Flooring was ordered online and was a discontinued colour so we purchased at a good price.
The beauty of a holiday house is you can be a little more flexible with the interior colour scheme. The entire process was supervised by Jess and Yogi.
They were ‘discussing’ sleeping territory here.


Having laid floating cliplock floor previously this was not a difficult job but if you are not confident you can hire someone to do this. Once the
floors were done the rest of doors went back on. As you can see, Jess and Yogi were very comfortable with the end result.


With cabinets back in and doors back on it was time to prepare the benchtops for re coating. We purchased a benchtop restoration kit at a cost
of $200 from Bunnings. Everything needed was in the kit including: cleaner / paint / coloured chips / sanding block / hardener sealer. Prepare
your benches by thoroughly cleaning and filling in larger chips or cracks and cover whatever isn’t being painted with plastic (this gets messy).


Paint the benchtop first. This process needed to be done quickly as the paint was required to be still ‘tacky’ when applying the coloured chips.
Be well prepared prior to starting this process. In your kit is a special tool to help with this application so you get an even spread of the chips.
After the chips have been applied you will need to leave for a minimum of 12 hours.


After the 12 hours you can start sanding the bench. This job takes patience and care. You will need to get a semi smooth finish without sanding
through to the old Laminex. After sanding is complete the work area must be thoroughly cleaned before you apply the two coats of clear resin.
This is the final stage and requires minimum 24 hours drying time.
TOP TIP: Watch the instruction video that comes with the pack BEFORE you start.


So here we are at the end. We picked up special tile paint for the splashback and cleaned up.

Yogi & Jess gave their final inspections the ‘tongues out’ and now our holiday house has a refurbished kitchen for under $500.
Tip: Bunnings was a great source for ideas.